

Introduction
Creating your own resin components offers a practical advantage for any beadweaver — you can produce cabochons in the exact color, finish, and size you need, ensuring you always have matching focal elements ready for future projects.
Beadweaving your handmade components is a rewarding process to follow. Each stage builds on the last, transforming simple materials into polished, wearable artwork.
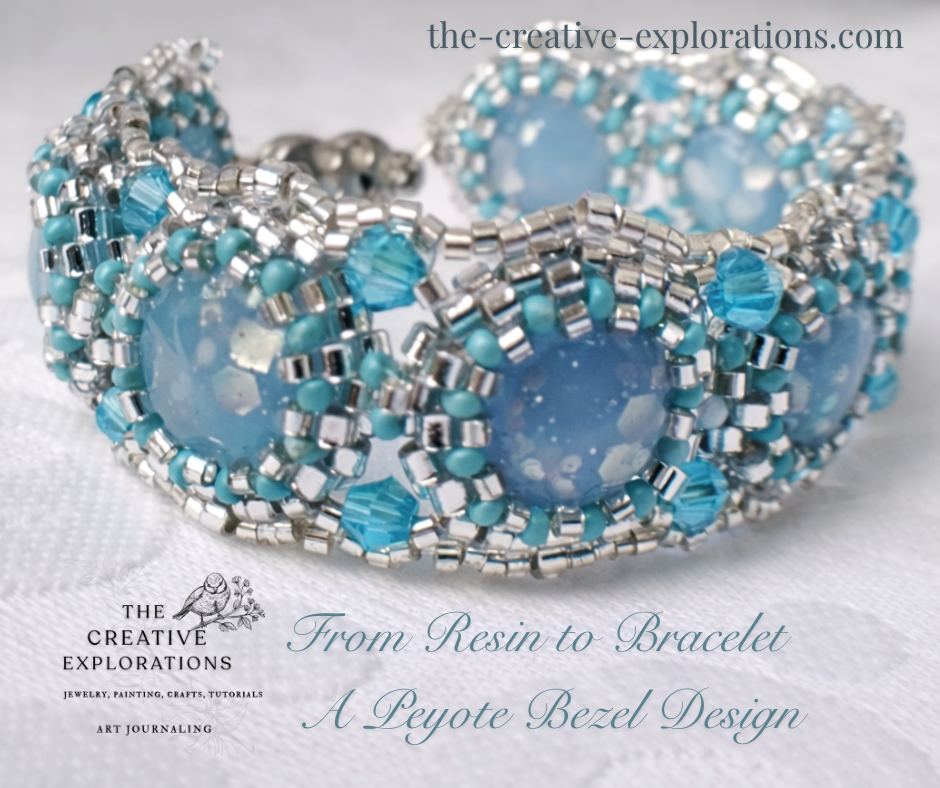
In this tutorial, we bezel the handmade resin cabochons, connect them into a bracelet, add crystal embellishments, and finish with a delicate silver overlay that gives the piece its signature lace-like look.
Whether you’re new to peyote bezels or an experienced beader exploring resin techniques, this project brings together texture, sparkle, and craftsmanship in a way that feels both meditative and inspiring.
Choosing Colours and Creating the UV Resin Beads

With spring settling in and brighter days ahead, a light-blue palette felt like the right direction. The resin beads were made in soft sky tones and enhanced with silver glitter for a subtle sparkle.
The cabochons used here were created in an earlier tutorial, where we explored a beginner-friendly method for crafting light-blue UV resin beads with silver glitter. You can revisit that process here:
How to Make Light-Blue UV Resin Beads with Silver Glitter
In this project, the construction relies on clean technique and steady stitching, creating an elegant, vintage-style bracelet you can enjoy for years.
This peyote bezel bracelet tutorial brings everything together: resin cabochons, peyote stitch, structural beadwork, and finishing techniques. By the end, you’ll have a complete bracelet and a set of skills you can apply to many future beadwoven designs.
Materials Used

A well-prepared materials list helps the beadweaving process flow smoothly and ensures consistent results. The components below are chosen to complement the light-blue resin focal beads and support the structure of the peyote bezels and the bracelet’s overall design.
- Handmade 10 mm UV resin cabochons (or flat-back cabochons of similar size), light blue with silver glitter
The cabochons serve as focal elements and define the bracelet’s color palette. - 2.5 mm seed beads, transparent with silver lining
Used for the first two rounds of the peyote bezel, forming the structural base around each cabochon. - 15/0 seed beads (silver and turquoise)
Used to tighten the bezel edges, secure the cabochons firmly in place, and add decorative structure. - 4 mm turquoise crystal bicones
Placed between the bezels to introduce movement, sparkle, and a soft contrast to the blue resin. - Beading thread
I prefer 0.20 mm nylon fishing line. It is transparent, durable, long-lasting, and easy to work with. It resists fraying and tangling, is widely available, and is an affordable option for beadweaving projects. - Beading needles — sizes 10 and 12
Size 10 works well for most rounds; size 12 is helpful when passing through tighter bead paths. - Heart clasp (or preferred closure) + 2 jump rings
For this bracelet, I used a vintage magnetic heart clasp repurposed from an older piece of jewelry. Reusing clasps is a sustainable and meaningful way to give existing materials a new life. - UV resin
Used for beadmaking, sealing knots, and finishing the cabochons. Sealing knots with UV resin is optional, but it can contribute to long-term durability. Structural reinforcement is also achieved through multiple thread passes during beadweaving. - UV lamp
Needed for curing both the resin cabochons and the final sealing layer.
How Many Bezels You Will Need

Depending on clasp style and width:
- Small-sized bracelet: approximately 8–9 bezels
- Medium-sized bracelet: approximately 10–11 bezels
Bezeling the UV Resin Double-Sided Rhinestone-Style Beads

If you’re new to peyote bezels or would like a clear explanation of even-count round peyote, you can find a detailed walkthrough in this earlier tutorial:
Round Crystal Bezel Studs — Peyote Bezel Technique
With the 10 mm double-sided rhinestone-style handmade resin beads prepared, we can begin the beadweaving process. The first stage is to build a secure peyote bezel around each cabochon. This bezel forms the structural foundation of the bracelet, holding the resin element firmly in place while creating a clean, decorative frame that integrates seamlessly into the rest of the beadwork.
Even-count round peyote is ideal for this type of component because it creates smooth, even tension around circular shapes. The walkthrough in the Round Crystal Bezel Studs tutorial offers clear guidance on starting, building, and tightening a bezel using size 11/0 and 15/0 seed beads.
Creating the Focal Bezels

Create peyote bezels around each resin cabochon using 2.5 mm seed beads for the base and 15/0 seed beads for the decrease rounds. Tighten the bezel securely around each cabochon. Repeat for all cabochons needed for your bracelet length.
To bezel each focal bead:
- String 26 beads (2.5 mm) to form your starting circle.
This bead count works well with 10 mm double-sided resin cabochons, creating a stable foundation that will tighten naturally as the peyote rounds build up. - After stringing the 26 beads, pass through them once more to close and reinforce the circle. This gives you a firm base to begin peyote stitching.
- Work the second round using the same 2.5 mm beads, following even-count round peyote. Each new bead is added into the gap between two beads of the previous round, forming the stepped peyote pattern. Keep tension even so the bezel forms cleanly.
- Before moving on to the tightening rounds, weave through these first two rounds once more. This reinforced peyote ring becomes the foundation that will securely frame the resin cabochon.
Tightening the Bezel and Securing the Cabochon
Once the two reinforced rounds of 2.5 mm beads are complete, begin tightening with smaller beads:
- Work one full round using 15/0 turquoise seed beads, placing one bead into each peyote gap. This round begins to draw the bezel inward.
- Follow with a second round using 15/0 silver seed beads. This layer tightens the bezel further and prepares the structure to hold the cabochon securely.
- After completing these two rounds, weave through both 15/0 rounds once more to strengthen tension and stabilize the bezel walls.
- Move your needle through the beadwork along the natural peyote diagonal path until you reach the opposite side of the bezel. Exit through one of the 2.5 mm beads from the first round.
- From here, work another round of 15/0 turquoise beads. This creates the inner frame line that will secure the cabochon.
- Place your 10 mm resin bead into the bezel.
- With the cabochon in position, work a final round of 15/0 silver peyote. This round locks the bead in place and completes the bezel’s inner tightening.
- To secure everything, weave through the last two added rounds once more, reinforcing tension.
- Finish by knotting your thread within the beadwork: pass through one or two beads, make a small knot, continue through another bead or two, and knot again. After exiting two beads beyond your final knot, trim the thread. Repeat the same process with the thread tail and trim.
Your first bezel is now complete. Repeat for all rhinestone-style beads you will use.
Connecting the Bezels into a Bracelet Base

With all bezels completed, begin joining them into a continuous bracelet structure:
- Exit from one of the outer 2.5 mm beads on the edge of the first bezel.
These beads sit at the midpoint of the bezel’s outer ring and create stable connection points. - Pick up one 15/0 turquoise seed bead.
This bead acts as the bridge between the two bezels and adds a decorative accent. - Insert your needle into the matching 2.5 mm bead on the second bezel and pick up one 15/0 turquoise seed bead.
Work in a circular direction so the bezels align naturally and sit flat next to each other. - Re-enter the first bezel by stitching back into the original 2.5 mm bead where you started.
- Weave in a circular path through the connection —
2.5 mm (bezel 1) → 15/0 turquoise → 2.5 mm (bezel 2) → back through the 15/0 turquoise.
Repeat this loop 3–4 times to reinforce the connection.

Tightening and Decorating the Link
After the initial turquoise connection is made:
- Exit from the turquoise 15/0 bead between the two bezels.
- Pick up one 15/0 silver bead.
- Stitch into the opposite turquoise 15/0 on the other side of the connection.
You’re creating a small triplet detail that locks the bezels together. - Weave through the three beads — turquoise → silver → turquoise — and continue through the adjacent 2.5 mm beads on both bezels.
- Repeat this path 2–3 times to fully secure and tighten the join.
Repeat until the bracelet base reaches your desired length.
Starting the Crystal Round

The bezels are now connected. Next, we build the crystal round by anchoring a 2.5 mm bead on top of each bezel and forming crystal–silver–silver triplets between them.
- Move the thread to the upper side of the bracelet.
Follow the peyote diagonals until your needle exits from the center bead on the upper edge of the bezel. - Add and center a 2.5 mm bead on top of the bezel.
This bead sits directly above the cabochon and anchors the next structural layer. - Slide the needle a few beads along the diagonal to reach the starting point for the crystal bridge.
- Pick up:
- 1 × 15/0 silver
- 1 × 4 mm crystal
- 1 × 15/0 silver
- Stitch into the exact opposite bead on the next bezel (the bead that mirrors your starting point). This creates a clean, symmetrical bridge.
- Center a 2.5 mm bead on the second bezel and repeat.

Once the first crystal connections are established, continue the same pattern on both sides of the bracelet.
Adding the First Clasp Connector

Before switching to the overlay round, add the first clasp connector:
- Move your thread to the outer edge of the last bezel.
- Exit from a 2.5 mm bead on the bezel’s edge.
- Pick up seven 15/0 silver seed beads.
- Stitch back into the same 2.5 mm bead to form a loop.
- Reinforce the loop by stitching through all seven beads and the 2.5 mm bead several times.
- Add small knots between beads while reinforcing.
- Exit a bead or two beyond your final knot and trim the thread.
This creates a strong, stable loop ready for a jump ring and clasp.
Silver Arches Overlay Round
Move your needle to the upper side again and exit from the centered 2.5 mm bead on top of the first bezel. This bead is the anchor for the overlay pattern.

Add the First Silver Arch
- Pick up three 15/0 silver seed beads.
- Stitch into the first 15/0 silver bead of the crystal triplet (the one closest to the bezel).
This creates the first small arch.
Add the Second Silver Arch
With your needle exiting from the silver bead of the triplet:
- Pick up three 15/0 silver.
- Stitch into the second 15/0 silver bead of the triplet.
This forms the arch above the crystal.
Add the Third Silver Arch
From the silver bead of the triplet:
- Pick up three 15/0 silver.
- Stitch into the next centered 2.5 mm bead on top of the following bezel.
This completes the decorative arc between two bezels.
Continue the same sequence to create a smooth, continuous decorative line.
Adding the Second Clasp Connector
Before switching to the mirrored overlay, add the clasp connector on the other end using the same seven 15/0 loop method.

Create the Mirrored Overlay Round
With both clasp connectors in place and the first overlay round complete:
- Move your thread to the other side of the bracelet.
- Position your needle at the centered 2.5 mm bead on that side.
- Repeat the same overlay sequence.
This completes the symmetry and adds the minimal lace-like silver edging.
Finalizing the Bracelet Structure With the Silver Overlay Round

Return to the silver arches and begin the final overlay pattern:
With your needle exiting from the centered 2.5 mm bead:
- Pass through the three 15/0 silver beads of the first arch.
- Pick up one 15/0 silver.
- Pass through the three beads of the next arch.
Continue:
- Pick up one 15/0 silver.
- Pass through the next arch.
- Pass through the centered 2.5 mm bead on the next bezel.
- Continue through the next arch.
- Pick up one 15/0 silver.
Repeat across the entire bracelet.
Reinforcing the Finished Structure
Move your thread back into the beadwork and make one final reinforcement pass:
- Stitch through the bracelet perimeter once more, passing through all beads.
- Follow peyote diagonals to keep the thread path invisible and smooth.
This final pass tightens the structure, perfects the shape, and significantly improves stability and longevity.
Weaving in the Thread Ends
When everything feels secure:
- Make small, hidden knots between beads.
- Pass through one or two beads after each knot to hide it.
- Continue weaving until the thread feels anchored.
- Trim after exiting one or two beads beyond the last knot.
Repeat for any remaining thread tails.
Attaching the Clasp
Your bracelet now has two seed-bead loops (seven 15/0 silver beads each) designed to hold jump rings.
To attach the clasp:
- Open a jump ring using two pliers.
- Slide it through the seed-bead loop.
- Add one half of your clasp.
- Close the jump ring firmly.
- Repeat on the other side.
This keeps the clasp flexible, secure, and aligned with the bracelet structure.
Sealing and Perfecting Your UV Resin Beads on the Finished Bracelet
Once the beadwork is reinforced and the clasp is attached, you can take an optional but highly effective final step: refining your UV resin cabochons directly on the finished bracelet.
Refining the Resin Surface
- Work with small, controlled amounts of UV resin.
- Use a fine brush and apply resin only to the cabochon surface.
- Avoid the beadwork; resin can seep into thread paths if applied too generously.
Work one bead at a time:
- Apply a thin coat.
- Cure immediately.
This prevents pooling or smudging.
Building Additional Coats
For deeper shine or a domed effect:
- Apply multiple thin coats, curing each layer.
Thin layers cure more evenly and reduce bubbles.
Sealing Knots (Optional)
- Apply a tiny amount of resin to knots with a needle tip or fine brush.
- Cure fully.
This adds long-term security and helps prevent thread ends from loosening.
Final Curing
Once all beads and knots are sealed:
- Cure the entire bracelet thoroughly under your UV lamp.
- Ensure all resin-coated surfaces are fully hardened before wearing or storing.
Final Thoughts

Your bracelet is now complete — a fully realized piece that brings together beadweaving, crystal work, and your handmade UV resin cabochons into a single cohesive design. From the first peyote bezel to the final silver overlay round, each stage adds structure, movement, and refinement.
This project celebrates the beauty of beadwork and craftsmanship, combining beadweaving with your own resin creations. The peyote bezels cradle the resin beads securely, the crystal rounds add sparkle, and the silver arches create the bracelet’s refined, lace-like finish. If you used handmade UV resin beads, the optional final coats allow you to perfect their shine directly on the finished piece while also sealing knots for long-term durability.
It’s a unique bracelet shaped by your choices and your creative voice — whether you wear it, gift it, or use it as inspiration for future designs.
Thank you for following along with this tutorial. I hope it inspires you to keep experimenting with beadwork, resin, and the beautiful possibilities that appear when the two meet.
If you’d like to keep exploring beadwork and resin techniques with me:
- Subscribe to the blog for upcoming tutorials and behind-the-scenes notes
- Join me on:
Your presence and support help this creative space grow, and I’m grateful to share it with you.
Until the next project — keep creating, keep experimenting, and keep your stories evolving.
You might also like these previous posts with related tutorials and techniques:
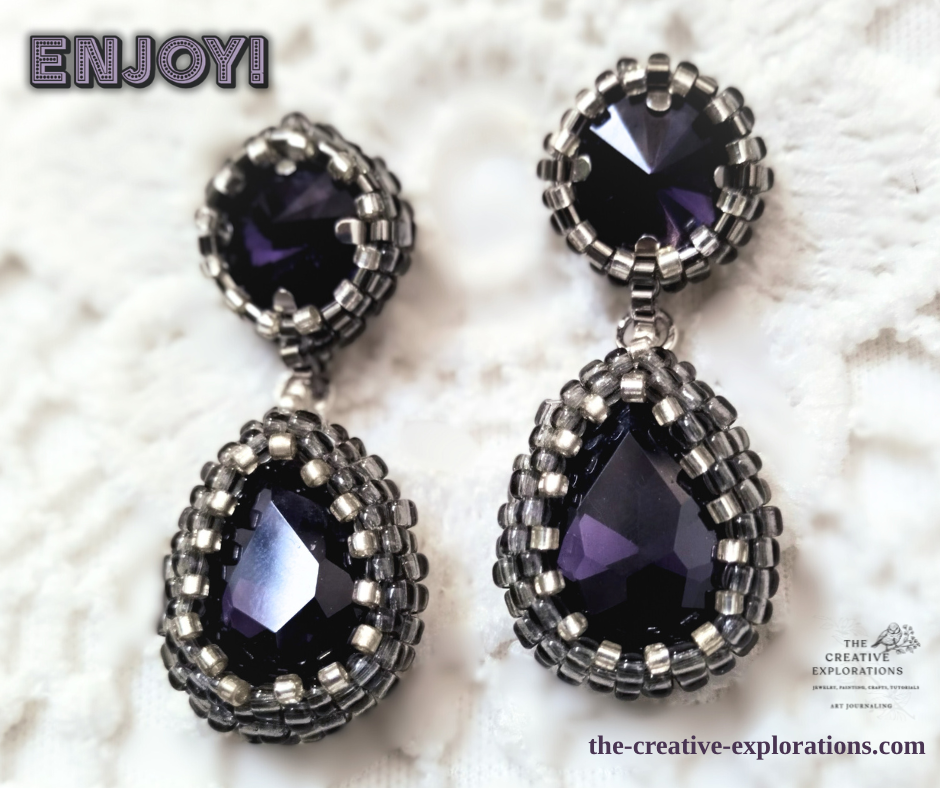
Bezeled Crystal Earrings Part 1 and Part 2.
Echoes of Green and Blue: A Vintage Beadwoven Resin Necklace
DIY Light Blue UV Resin Beads with Glitter
DIY Black, Purple and Silver UV Resin Beads


Leave a Reply